Banana Pudding Cheesecake Cones are like a carnival in your mouth, bursting with sweet banana flavor and creamy cheesecake goodness, all nestled in a crispy cone. Imagine the delightful crunch of a wafer cone giving way to layers of velvety cheesecake and fluffy banana pudding—it’s enough to make anyone weak at the knees.
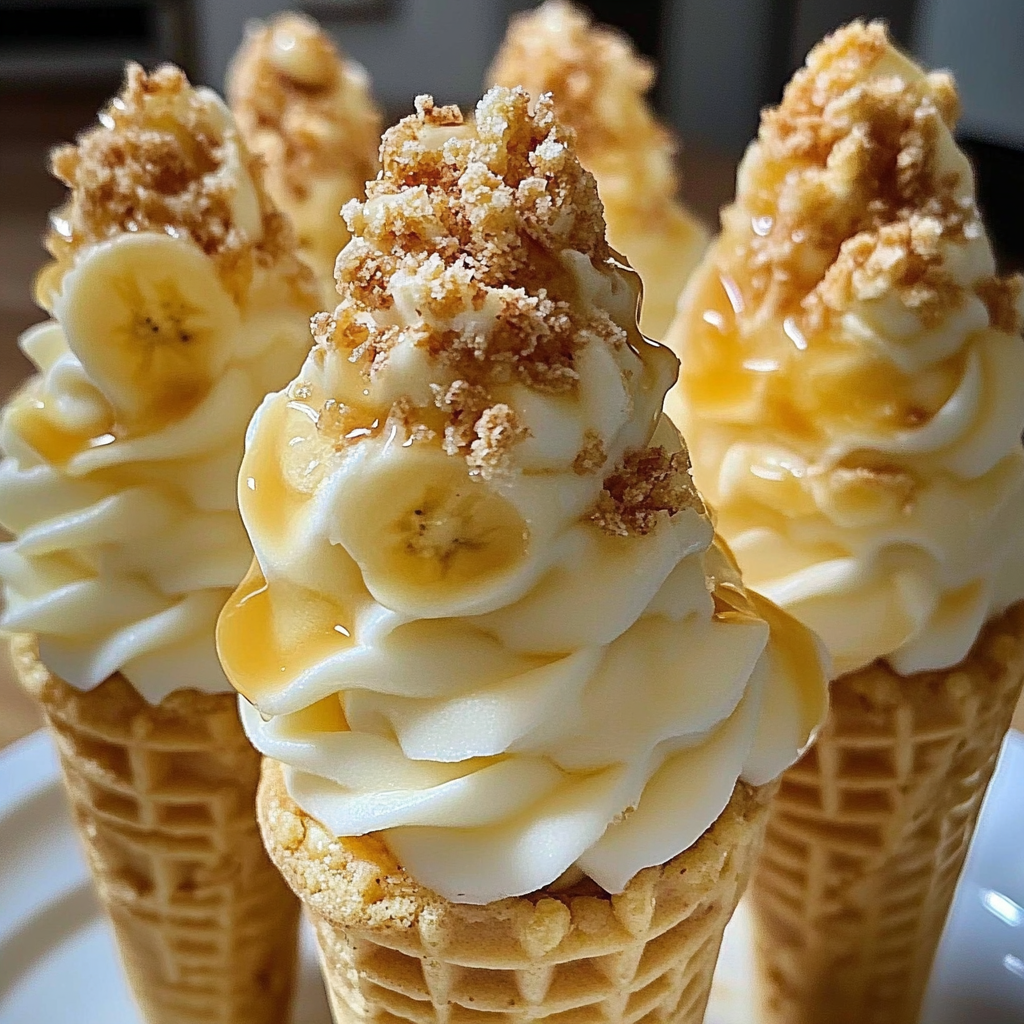
As I prepared these delightful treats, I couldn’t help but reminisce about my childhood. Summer days spent on the porch, fighting over the last scoop of banana pudding with my siblings. Now, we can relive those moments with a twist that takes us from the classic dessert to an exciting handheld delight. Perfect for parties or just an indulgent night in, these cones promise an explosion of flavor that will have you reaching for seconds (or thirds).
Why You'll Love This Recipe
- These Banana Pudding Cheesecake Cones are incredibly easy to whip up, making them perfect for any occasion.
- The harmonious blend of banana and cheesecake creates a flavor profile that is simply irresistible.
- Visually, they are a feast for the eyes with their vibrant colors and playful presentation.
- Plus, they’re versatile enough to customize with your favorite toppings or flavors!
Ingredients for Banana Pudding Cheesecake Cones
Here’s what you’ll need to make this delicious dish:
-
Wafer Cones: These serve as the delightful vessel for your dessert—choose sturdy ones to hold all that creamy goodness.
-
Cream Cheese: Make sure it’s softened; this helps achieve that rich and creamy cheesecake texture.
-
Powdered Sugar: For sweetness without grittiness, this sugar dissolves beautifully into your mixture.
-
Vanilla Extract: A splash adds depth and warmth to your cheesecake filling.
-
Bananas: Use ripe bananas for maximum sweetness; they really bring out that classic banana pudding flavor.
-
Instant Vanilla Pudding Mix: This helps create that creamy layer reminiscent of traditional banana pudding.
-
Milk: Just a splash to blend everything together into a luscious filling.
The full ingredients list, including measurements, is provided in the recipe card directly below.
How to Make Banana Pudding Cheesecake Cones
Follow these simple steps to prepare this delicious dish:
Step 1: Prepare Your Filling
In a large mixing bowl, beat together softened cream cheese and powdered sugar until smooth and creamy. Add vanilla extract and mix until well combined.
Step 2: Add Bananas
Slice your ripe bananas and fold them gently into the cream cheese mixture. This step is crucial because it infuses every bite with that irresistible banana flavor.
Step 3: Mix the Pudding
In another bowl, whisk together instant vanilla pudding mix and milk until it thickens. Once thickened, fold this pudding into your cream cheese-banana mixture for extra creaminess.
Step 4: Fill Those Cones
Carefully spoon the delicious filling into your wafer cones. Don’t be shy—pack them generously! The more filling, the better!
Step 5: Chill Out
Place filled cones in the refrigerator for about 30 minutes. This helps them set up nicely so you can enjoy every delectable bite.
Step 6: Enjoy!
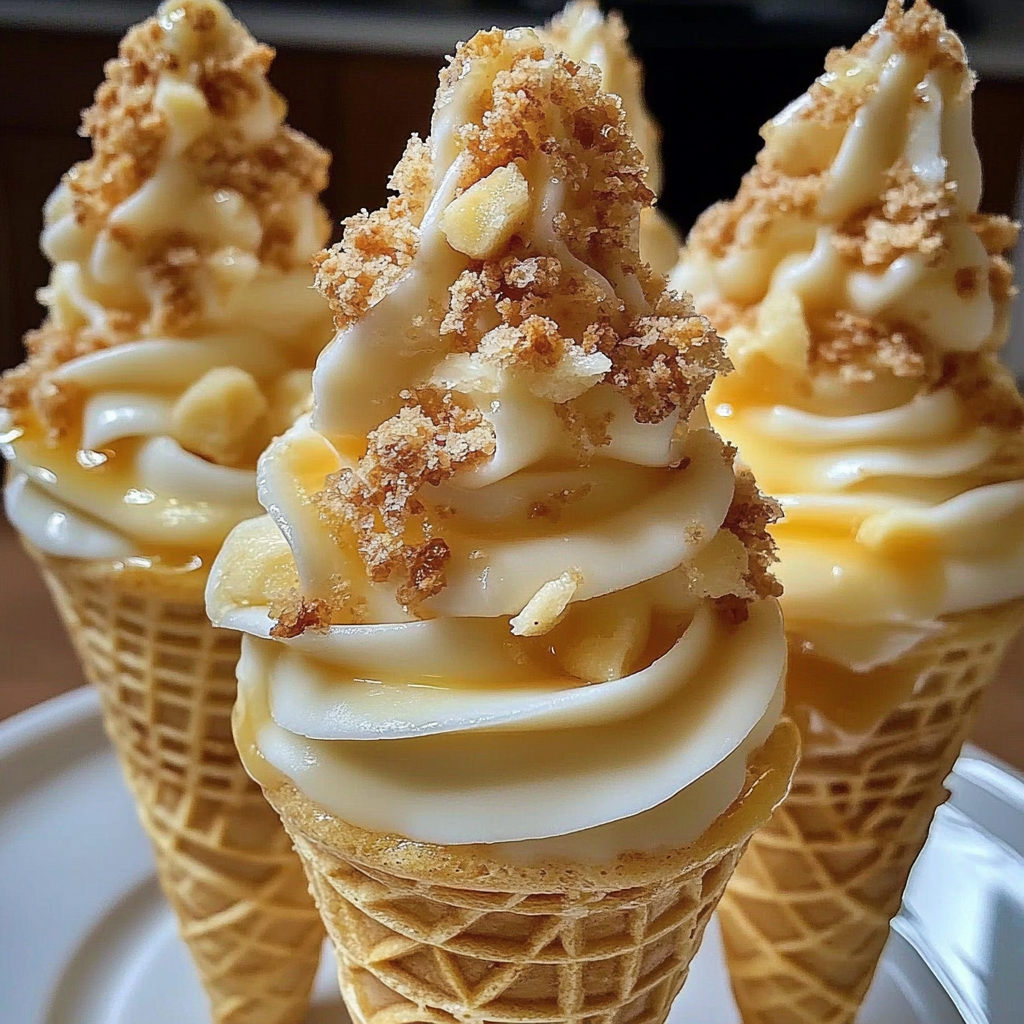
Serve your Banana Pudding Cheesecake Cones chilled, topped with extra whipped cream or a sprinkle of crushed cookies if you’re feeling fancy.
These delightful cones are perfect for summer gatherings or cozy nights when you crave something sweet yet lighthearted. Transfer to plates and watch as everyone dives into this delightful treat!
You Must Know
- These delightful Banana Pudding Cheesecake Cones are not just desserts; they are portable joy!
- Their creamy texture and sweet flavor make them a hit at parties, while their fun presentation brings out the kid in everyone.
- Get ready for a deliciously messy experience!
Perfecting the Cooking Process
Start by making the cheesecake filling first, allowing it to chill while you prepare the cones. This way, everything comes together smoothly, and you’re not scrambling at the last minute. Layering is key to create a visually appealing treat.
Add Your Touch
Feel free to swap out vanilla wafers for graham crackers or try different fruits like strawberries or peaches. A drizzle of chocolate sauce can add an extra kick, transforming these cones into a decadent dessert that matches your taste!
Storing & Reheating
Store any leftover Banana Pudding Cheesecake Cones in an airtight container in the fridge for up to two days. Avoid freezing them, as the texture will change. Enjoy chilled for a refreshing treat!
Chef's Helpful Tips
- Use ripe bananas for maximum flavor; they add natural sweetness and creaminess to your filling.
- Ensure your cream cheese is softened properly, which helps create that luscious texture.
- Layer generously for those Instagram-worthy shots that will have your friends drooling!
Sharing these Banana Pudding Cheesecake Cones at my friend’s birthday party was unforgettable. The smiles on everyone’s faces as they dug in made all the mixing and layering worth it!
FAQs:
What are Banana Pudding Cheesecake Cones?
Banana Pudding Cheesecake Cones are a delightful dessert that combines the creamy goodness of cheesecake with the classic flavors of banana pudding, all served in a crispy cone. This treat features layers of cream cheese, whipped cream, and banana slices, providing a perfect blend of textures and tastes. They are easy to assemble and make for a fun, portable dessert option that everyone will love.
How do I store Banana Pudding Cheesecake Cones?
To keep your Banana Pudding Cheesecake Cones fresh, store them in an airtight container in the refrigerator. It is best to consume them within 1-2 days after assembly to maintain their texture and flavor. If you prepare the filling in advance, you can fill the cones just before serving to prevent them from getting soggy.
Can I make Banana Pudding Cheesecake Cones ahead of time?
Yes, you can prepare the filling for Banana Pudding Cheesecake Cones ahead of time. Make the cheesecake mixture and banana slices in advance and store them separately in the fridge. Assemble the cones just before serving to ensure they remain crunchy and delicious. This strategy makes it easy to serve fresh desserts without extensive prep work on the day of your event.
What can I substitute for bananas in Banana Pudding Cheesecake Cones?
If you’re looking for a different flavor or need a substitute, consider using other fruits like strawberries or peaches. You can also try chocolate chips or crushed cookies for added texture. Keep in mind that these substitutions will change the overall flavor profile but will still create a delicious treat that everyone can enjoy.
Conclusion for Banana Pudding Cheesecake Cones:
In summary, Banana Pudding Cheesecake Cones are a delightful fusion of two beloved desserts that offer convenience and taste. These cones feature creamy cheesecake filling layered with fresh bananas, all nestled in a crunchy cone. With easy preparation options and versatile ingredient substitutions, they make an ideal choice for gatherings or casual snacks. Enjoy making this fun dessert that brings joy to any occasion!
Banana Pudding Cheesecake Cones
Banana Pudding Cheesecake Cones are the ultimate handheld dessert that combines creamy cheesecake and the beloved flavor of banana pudding, all served in a crispy wafer cone.
- Prep Time: 15 minutes
- Cook Time: 0 minutes
- Total Time: 15 minutes
- Yield: 4 servings 1x
- Category: Dessert
- Method: No Cooking
- Cuisine: American
Ingredients
- 4 wafer cones
- 8 oz cream cheese (softened)
- 1 cup powdered sugar
- 1 tsp vanilla extract
- 2 ripe bananas (sliced)
- 3.4 oz instant vanilla pudding mix
- 1 cup milk
Instructions
- In a mixing bowl, beat softened cream cheese and powdered sugar until smooth. Stir in vanilla extract.
- Gently fold sliced bananas into the cream cheese mixture.
- In another bowl, whisk instant pudding mix with milk until thickened, then fold this into the banana cream mixture.
- Generously spoon the filling into each wafer cone.
- Chill filled cones in the refrigerator for 30 minutes before serving.
Nutrition
- Serving Size: 1 cone (110g)
- Calories: 320
- Sugar: 22g
- Sodium: 210mg
- Fat: 16g
- Saturated Fat: 10g
- Unsaturated Fat: 5g
- Trans Fat: 0g
- Carbohydrates: 40g
- Fiber: 1g
- Protein: 4g
- Cholesterol: 40mg
Keywords: - For added crunch, mix in crushed cookies or chocolate chips. - Substitute vanilla wafers with graham crackers for a unique twist. - Store any leftovers in an airtight container for up to two days.

